Should You Upgrade to a High-Efficiency AC? Pros & Cons for Austin Homeowners
As energy costs continue to rise in Central Texas, more homeowners are considering whether upgrading to a high-efficiency air conditioner is worth the investment. These advanced systems promise lower utility bills and better performance—but are they the right fit for every home?
At Intelligent Air Services, we believe in helping our Austin-area customers make smart, informed decisions.
In this blog, we’ll break down the benefits and potential drawbacks of high-efficiency AC units, so you can decide if now is the time to make the switch.

A high-efficiency air conditioner is designed to cool your home using less energy, and its performance is typically measured by its SEER2 (Seasonal Energy Efficiency Ratio 2) rating. This updated standard reflects more accurate testing conditions and real-world performance. Generally, a SEER2 rating out of 16 or higher is considered high efficiency, with some premium AC models reaching SEER2 ratings in the 20s.
However, efficiency isn’t just about ratings. It’s also about the technology inside the unit. High-efficiency systems often feature variable speed motors and inverter-driven compressors, which allow the system to adjust its output based on your home’s cooling needs, rather than turning on and off at full blast like older, single-stage units. This results in more consistent indoor temperatures, quieter operation, and reduced energy waste.
In addition, these systems tend to be compatible with smart thermostats, giving homeowners the ability to fine-tune comfort settings, set cooling schedules, and even control the system remotely. When combined, these features not only improve energy efficiency but also contribute to a more comfortable, environmentally friendly home.
At iAir, we understand the importance of having a well-functioning AC unit when summer arrives. That is why we offer energy-saving cooling solutions to keep your home cool all season. Our certified technicians can help you upgrade or install a new air conditioner using advanced tools and techniques, backed by excellent customer service.

Some benefits of upgrading to a high-efficiency AC include:
Lower Energy Bills
One of the biggest advantages of a high-efficiency air conditioner is the noticeable reduction in monthly utility costs. Because these systems use less energy to produce the same, or better, cooling results, you’ll likely see consistent savings over the life of your unit. Over time, these savings can help offset the higher upfront investment.
Improved Indoor Comfort
High-efficiency ACs are equipped with advanced features like variable speed operation and better airflow control. This allows them to maintain more stable indoor temperatures, minimize hot and cold spots, and improve humidity control, especially in humid climates. The result is a home that feels more comfortable all day long.
Environmentally Friendly
Energy-efficient systems reduce your home’s carbon footprint by consuming less electricity, and many models now use eco-friendlier refrigerants that have lower global warming potential (GWP). This makes them a smarter, more sustainable choice for environmentally conscious homeowners.
Rebates and Incentives
To encourage energy efficiency, many federal, state, and local utility companies offer rebates and tax credits for upgrading to high-efficiency HVAC systems. These incentives can significantly reduce your out-of-pocket costs, making the decision to upgrade even more affordable.
Knowing the right time to upgrade to a high-efficiency air conditioner can help you avoid costly repairs and maximize your return on investment. Here are some key signs that it may be time to make the switch:
1. Your System is 10 to 15 Years Old
Most air conditioners have a lifespan of about 10 to 15 years. As they age, their efficiency declines, and the risk of failure increases. If your unit is nearing the end of its service life, upgrading now can save you from unexpected breakdowns and rising repair costs.

2. Rising Energy Bills or Poor Cooling Performance
If your utility bills are creeping up each summer, or your AC struggles to keep your home cool, your system may be working harder than it should. New high-efficiency models operate more effectively, using less energy to maintain your desired comfort level.
3. Frequent Repairs or Expensive Fixes
Constant repairs can add up quickly. If you’re facing a major repair bill or repeated service calls, it may be most cost-effective to invest in a new, reliable system rather than continuing to patch an aging one.
4. Recent Home Upgrades
Have you recently improved your home’s insulation, sealed air leaks, or installed a smart thermostat? These upgrades improve energy efficiency, but your old AC might not be able to take full advantage. A modern high-efficiency system can better integrate with these improvements, delivering optimized performance and comfort.
Intelligent Air Services makes it easy to get the HVAC services you need for optimal home comfort. Ask our team about our current specials, discounts, and rebates designed to save you money without sacrificing the quality of your installation. We also offer rebates to get you the most from your HVAC service.
While high-efficiency air conditioners offer many benefits, they’re not the perfect fit for every situation. Here are a few potential drawbacks to keep in mind before committing to an upgrade:
Upfront Costs
High-efficiency systems typically come with a higher initial price tag due to advanced technology and improved components. While long-term energy savings can help offset this investment, the upfront costs may be a barrier for some homeowners, especially those without available rebates or financing options.

Ductwork Compatibility
Older homes with outdated or leaky ductwork may not fully benefit from a high-efficiency AC unless the duct system is also upgraded. In some cases, modifications are needed to handle increased airflow or to prevent energy loss, which can add to the overall cost of installation.
Diminishing Returns in Mild Climates
If you live in a region with relatively mild summers or only use your air conditioner occasionally, the energy savings from a high-efficiency unit may not be significant enough to justify the added expense. In these situations, a mid-efficiency system could provide a better balance between cost and performance.
Upgrading to a high-efficiency air conditioner is a smart move, but choosing the right system is just as important as making the decision to upgrade. Here’s how to make sure you select the best unit for your home and long-term needs:
Get a Proper Load Calculation
Before purchasing any new AC system, it’s essential to have a licensed HVAC professional perform a Manual J load calculation. This assessment takes into account your home’s size, layout, insulation, windows, and more to determine the exact cooling capacity needed. Oversized or undersized systems can lead to poor efficiency and uneven comfort.
Compare Brands, Warranties, and SEER2 Ratings
Not all high-efficiency systems are created equal. Look at SEER2 ratings to gauge efficiency, but also consider brand reputation, product reliability, and available features. Warranty coverage is also important as longer and more comprehensive warranties can provide peace of mind and reduce future repair costs.
Think About Future Home Needs
Are you planning a home addition, finishing a basement, or expecting a change in household size? Make sure your new AC system can accommodate future changes without needing another upgrade. Choosing a slightly more powerful and flexible unit now could save you money down the line.
Once you’ve installed your new air conditioner, you’ll want to ensure that it continues to work at peak performance for many years. At iAir, we offer a maintenance plans that give customers priority scheduling and reduced rates on spring and fall maintenance calls. Regular AC tune-ups can help your system run more efficiently and reliably.
Upgrading to a high-efficiency air conditioner can offer big benefits—from lower energy bills to improved comfort during Austin’s hottest months. But it’s not a one-size-fits-all solution. The right choice depends on your home, your budget, and your long-term goals.
At Intelligent Air Services, our goal is to help you make the most informed, cost-effective decision possible. If you’re thinking about upgrading your AC system, reach out to our expert team for honest guidance and a no-pressure quote. We’re here to help you stay cool, comfortable, and confident in your choice.

Most homeowners wait until their HVAC system breaks down in the middle of summer — right when they need it the most. But those who plan ahead know that spring is the ideal time to take action, and Intelligent Air Services is the trusted name Austin families rely on to get the job done right.
Since 2013, iAir has helped thousands of homeowners across Austin prepare for the heat with dependable service, straightforward advice, and high-efficiency upgrades. We believe that replacing your HVAC system shouldn’t be a last-minute decision — it should be a smart, well-timed investment in your comfort.
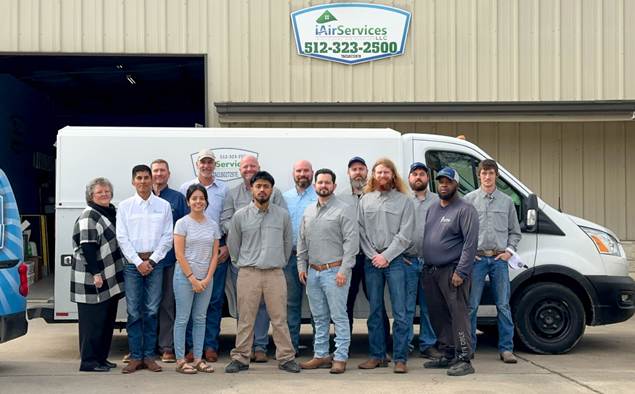
In this guide, we’ll walk you through the practical reasons why spring is the best season to replace your HVAC system. From cost savings and cleaner indoor air to peace of mind before summer hits, you’ll learn how a timely replacement can make all the difference.
1. Shorter Wait Times and Easier Scheduling with HVAC Professionals
Spring is considered the off-season in the HVAC industry. Because demand is lower, you’ll likely get an appointment sooner — and at a time that works best for your schedule.
This means you don’t have to wait days or weeks like you might in peak summer. It also gives HVAC teams more time to focus on your installation without rushing between emergency calls. Flexible scheduling also helps prevent last-minute decision-making and missed opportunities for rebates or upgrades.
2. Milder Temperatures Keep Your Home Comfortable During Installation
Replacing an HVAC system involves shutting it down during removal and installation. In spring, outdoor temperatures are generally pleasant, so your indoor environment stays comfortable even when the system is off.
You won’t need to rely on fans or portable units during the install, which can take several hours depending on your setup. This also minimizes disruptions for homes with kids, elderly residents, or individuals working from home.
3. Off-Season Demand Leads to More Attentive Service and Lower Prices
During the summer, HVAC technicians often juggle packed schedules full of emergency repairs. In spring, the workload is lighter, which means more time dedicated to each job and a higher quality of service.
You may also benefit from:
- Off-season pricing from contractors
- Less competition for top-rated technicians
- More time to ask questions and explore options without pressure
4. Spring Rebates and Promotional Offers Help Reduce Upfront Costs
Manufacturers and energy providers often roll out spring rebates to encourage early upgrades. These can include cash-back offers, installation discounts, or financing deals.
At iAir Services, we’ll walk you through available rebates, help you apply, and even offer our own spring promotions to lower your costs.
5. Early Replacement Gives You Access to the Newest, Most Efficient Systems
HVAC brands typically release their newest models in the first and second quarters of the year. That means spring is the ideal time to access updated technology with better energy ratings and improved features.
Upgrading early gives you a competitive advantage. You’ll have access to:
- High-SEER rated units (Seasonal Energy Efficiency Ratio)
- Variable-speed compressors
- Smart-compatible systems for automated control

6. You Start Saving on Energy Bills Before Summer Arrives
Older HVAC systems often run less efficiently, consuming more energy to keep your home cool. By replacing yours in spring, you’ll benefit from lower energy bills as soon as temperatures start to rise.
Newer systems can save homeowners up to 20–40% on cooling costs compared to units that are 10–15 years old. Those savings add up quickly during a long Texas summer.
7. Improved Indoor Air Quality Helps Ease Spring Allergy Symptoms
Spring brings a surge in pollen, mold spores, and dust — all common allergy triggers in Austin. A new HVAC system can help filter out these irritants more effectively.
Look for systems with enhanced filtration, HEPA filters, or options like:
- UV light air purifiers
- Whole-home dehumidifiers
- Media filters for finer particle control
These upgrades can dramatically improve the comfort and air quality in your home during allergy season.
8. Spring Planning Gives You Time to Choose the Right System and Financing
When you’re not in a rush, you can take time to research your options and understand what features matter most. That includes comparing energy ratings, system sizes, and warranty options.
Many homeowners also use this time to:
- Explore different financing plans
- Ask about energy audits and load calculations
- Coordinate installation timelines around family schedules
Our team at iAir Services offers free load calculations and system recommendations so you can make the right decision without pressure. We also provide multiple financing plans to fit your timeline and budget.
10+ Years Old Unit
If your HVAC system is over 10 or 15 years old, it may not be running as efficiently as it once did. Even if it’s still working, older systems tend to lose performance and cost more to operate over time.
You may notice signs like:
- Slower cooling cycles
- Difficulty keeping a steady temperature
- A spike in maintenance needs
Constant Repairs
Needing repairs once or twice a year is normal—but if you’re calling the technician every few months, it’s time to rethink things. Multiple fixes add up and usually signal bigger problems ahead.
It’s often smarter to invest in a new system than keep patching one that’s breaking down piece by piece.
High Energy Bills
If your electricity bill keeps creeping up even with regular maintenance, your HVAC could be to blame. Older systems use more energy to do the same work, especially during warmer months.
These costs can quietly build up over time and become just as expensive as a replacement.
Uneven Cooling
Some rooms too warm, others freezing? That’s a common issue when a system is struggling to circulate air properly. It may be due to aging components, poor ductwork, or a unit that’s simply too old for your home’s current needs.
This inconsistency is often one of the first signs homeowners notice.
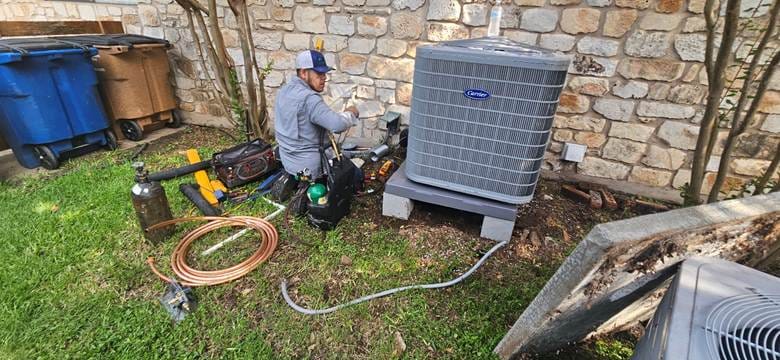
Still Uses R-22
If your system still runs on R-22 refrigerant, also known as Freon, it’s outdated. This refrigerant has been phased out in the U.S., making it expensive and hard to find.
Replacing the system is the only long-term solution, especially if there’s a leak.
Unusual Noises or Odors
A humming HVAC is normal. Loud banging, grinding, or musty smells? Not so much. These are signs of worn-out components or even mold inside the system.
Ignoring these issues can lead to bigger damage — or serious air quality problems in your home.
A spring tune-up is your HVAC system’s health check. It keeps everything running efficiently and helps spot small issues before they become major problems.
Here’s what a typical professional tune-up includes:
- Air filter check and replacement – Keeps airflow strong and air quality clean.
- Condenser and evaporator coil cleaning – Removes buildup to improve cooling efficiency.
- Electrical inspections and tightening – Prevents system failure and fire hazards.
- Refrigerant level checks – Ensures your unit is cooling properly and not leaking.
- Thermostat testing and calibration – Keeps temperatures consistent and accurate.
- Lubricating moving parts – Reduces friction, noise, and wear.
- Ductwork inspection – Identifies leaks or blockages that waste energy.
- System performance test – Verifies everything is operating as it should before peak season.
Regular tune-ups can extend the life of your system, reduce your energy bills, and improve indoor air quality. It’s a simple step that makes a big difference before summer sets in.
Intelligent Air Services has been serving Austin homes since 2013 with a strong focus on trust, quality, and local care. We’re a family-owned team that understands what Texas homeowners need — especially when the summer heat kicks in.
All of our technicians are NATE-certified and fully licensed, so you know you’re getting professional, dependable service every time. From free load calculations to expert guidance, we make sure your system fits your home and your budget.
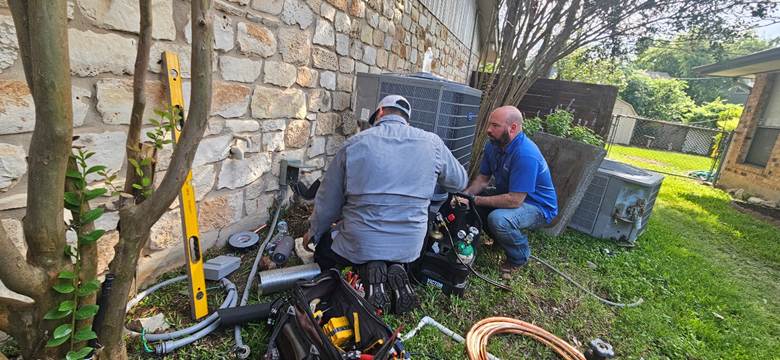
We only work with brands we believe in, like Carrier, Ecobee, Honeywell, and Aprilaire. That means better performance, energy savings, and long-term peace of mind for you and your family.
Customers stick with us because we show up on time, treat their homes with respect, and always do the job right.
Need help after hours? We’re available 24/7 and offer financing options and seasonal deals to make things easier when it matters most.
How long does it take to replace an HVAC system?
Most residential HVAC replacements take about one full day to complete. If ductwork or additional upgrades are needed, it may take a little longer.
Is it okay to replace only the AC or heater and not the whole system?
It’s possible, but not always recommended — especially if both units are the same age. Mismatched systems can cause performance issues and reduce overall efficiency.
What size HVAC system do I need for my home?
The right size depends on your home’s square footage, insulation, layout, and more. A professional load calculation from a licensed technician ensures you get a system that fits properly.
Can I stay home during the replacement?
Yes, you can stay home during the installation, and most homeowners do. Just keep in mind there will be some noise and technicians moving in and out.
Will a new HVAC system really lower my energy bills?
Absolutely — modern systems are far more efficient than those made a decade ago. You could see savings of up to 20–40% depending on your previous system’s age and condition.
Is financing available for HVAC replacement?
Yes, many HVAC companies offer flexible financing plans to make the cost more manageable. Intelligent Air provides seasonal promotions and financing options tailored to your needs.
Spring isn’t just a convenient time to replace your HVAC system — it’s the smartest move you can make for long-term comfort, energy savings, and peace of mind. You get better service, better prices, and a home that’s ready for anything the Texas summer throws at it.
Intelligent Air Services is here to help you make that upgrade the right way. Call us at (512) 323-2500 or visit iairservices.com to schedule your replacement estimate today.
Learn more about our services at Intelligent Air Services
A malfunctioning thermostat can disrupt your home’s comfort and lead to unnecessary stress. Before you panic and call for professional help, there are several troubleshooting steps you can take to identify and possibly resolve the issue on your own.
Intelligent Air Services, trusted HVAC professionals in Austin and surrounding areas since 2013, are here to guide you through these steps.
In this blog, we’ll outline some simple yet effective troubleshooting techniques to help you get your thermostat back in working order.

At Intelligent Air Services, we understand how a seemingly dead thermostat may cause concern. Let’s explore some of the most common reasons a thermostat may appear dead and how our licensed and trained HVAC technicians can assist you with getting your thermostat back in good working order.
The Thermostat Is Turned Off
If your thermostat has a blank screen and appears to be dead, check to see if it has been turned off. While unlikely, someone in your home may have accidentally bumped into the device, turning it off in the process. Note that some thermostats have a press button that turns off the device, while others have a switch.
In addition, you will also want to check the breaker box to ensure the breaker for that section of the house has not been tripped.

Batteries are Dead
One of the most common reasons for a thermostat to stop working is dead batteries. Some thermostats are directly connected to the HVAC system using a C-wire or common wire to supply power. However, others require power from batteries that can drain down over time.
If you have a thermostat that runs on batteries, replace them with fresh batteries to see if it turns back on. Most thermostats require AA or AAA batteries to operate.
Low Voltage

Thermostats that don’t run on batteries generally use power supplied by a transformer’s 24 volts, located within your HVAC equipment. While experienced HVAC technicians will ensure that the unit produces adequate voltage to power the thermostat, a do-it-yourself job or inexperienced technician may overlook this important step.
When an HVAC system does not produce enough voltage, the thermostat’s screen can go blank due to a lack of power. In this case, bringing in a reputable HVAC technician can remedy the problem. iAir offers performance and satisfaction guarantees to ensure that any equipment installed is sized accurately for the home and is properly maintained and operated in accordance with the manufacturer’s operating manuals.
Incorrect Settings
If you look at your thermostat, you’ll find a variety of settings. Accidentally changing these settings could make your thermostat appear blank, even though it’s still in good working order.
For example, you may have set the brightness level on your thermostat too low, making the screen appear blank. Some thermostats also have settings that automatically adjust the brightness level of the screen based on the amount of light in the room to reserve battery power. Modify the settings to determine if they’re to blame for the blank screen.
Dirty Air Filter

While it may seem unlikely, a dirty or clogged air filter can contribute to a thermostat that appears dead. When you forget to clean or replace your air filter on a regular basis, it can accumulate dirt, dust, and other debris that forces the equipment to work harder. This excess stress can overheat or overload your unit, forcing it to shut down as a safety precaution.
Check to see if there are any blocked or closed air vents. Also, remove any obstructions that could be preventing adequate airflow. As clogs can occur in other parts of the HVAC equipment, it’s important to have your unit regularly cleaned and maintained. At Intelligent Air Services, we offer our HVAC maintenance plan to protect your system against costly breakdowns. Give us a call anytime at (512)323-2500 or visit https://www.iairservices.com/maintenance-plans/ to learn more.
Tripped Circuit Breaker
When troubleshooting why your thermostat appears dead, determine if the root cause is a tripped circuit breaker. Every home is wired uniquely, and you may find that your thermostat shares a breaker. If the device or appliance on the same breaker pulls too much power, it could overload the system, causing the thermostat to automatically power off.
Look at your circuit breaker panel and find the breaker that powers the thermostat. The switch will have three settings: “on,” “off,”, and a neutral setting in the middle. If the breaker is tripped, the switch will be in the middle. To turn it back on, set the breaker to “off” and then back to “on.”
Tripped Safety Switch
Along with checking the circuit breaker to see if it’s been tripped, check the safety switch. HVAC systems contain built-in safety switches designed to automatically turn off the unit in a hazardous situation, such as high temperatures or excess moisture. You can locate the safety switch in the drain pan.
If you check the safety switch and notice that the sensor has gone off, contact a local HVAC technician to inspect the system for potential problems. With more than 10 years in the business, our background-checked technicians have the skills, knowledge, and ongoing safety training to take on any heating or cooling-related problem.
Open Furnace Door
In some cases, a thermostat may appear dead even though there’s nothing physically wrong with the thermostat or HVAC equipment. Instead, the furnace door may simply be ajar. While not every thermostat is sensitive to this issue, a loose or open furnace door may cause the thermostat to shut off as a safety precaution.
Before continuing to troubleshoot the thermostat, check to see that the furnace door is firmly secured.
Faulty or Dirty Wiring
If your thermostat is not working properly or appears to be dead, bring in an HVAC technician to inspect the wiring. Dirt and dust can accumulate on wiring over time, and they may require cleaning to work properly again. Cleaning wires can be dangerous and should only be performed by a trained HVAC professional.
Wiring can also become loose or damaged. Loose wiring can occur due to age or property damage and will generally need to be tightened up. If you have pests in your walls, basement, or attic, these critters could also be chewing on the wires, causing them to short-circuit.
Incompatible Parts

If your thermostat turned off directly after repairs were made to your HVAC system, the reason it appears dead could be due to incompatible replacement parts. Replacing any components inside or outside of an air conditioning system or installing a new furnace or heat pump could lead to problems with the thermostat if any of the parts are not compatible with the unit.
As this problem can be difficult to diagnose on your own, it’s best to bring in an experienced HVAC technician to diagnose the issue and recommend a safe solution. At iAir, we offer free estimates on all equipment replacements and great financing options on a new furnace or AC.
Old or Broken Thermostat
Despite your best efforts to maintain your thermostat since its initial installation, no device lasts forever. If your thermostat is old, it may simply be broken and cannot be repaired. The average thermostat has a life expectancy of about 10 years. If your thermostat has reached or surpassed its life expectancy, consider a replacement.
The cause of an old or broken thermostat is often the thermostat control board. This board is responsible for communicating with other HVAC equipment in your home to ensure that your heating and cooling systems run smoothly. If your thermostat control board has too much wear or tear due to age or is otherwise malfunctioning, have it promptly replaced.
Schedule Fast Service Today

If your thermostat is still not working after trying these troubleshooting steps, it may be time to call in the experts. At Intelligent Air Services, we’ve been Austin’s trusted HVAC professionals since 2013, and we’re ready to help with any thermostat or HVAC issue you’re facing.
Don’t let a malfunctioning thermostat disrupt your comfort—contact us today at (512)323-2500, and we’ll ensure your system is running smoothly to keep your home comfortable year-round.
For expert assistance, contact Intelligent Air Services
Mini-split systems are gaining popularity for their efficiency and flexibility, but there are still many misconceptions surrounding them. As with any HVAC option, it’s important to separate fact from fiction before making a decision.
Since 2013, Intelligent Air Services has been the trusted name in HVAC solutions for Austin homeowners.
In this blog, we’ll debunk some of the most common myths about mini-split systems, helping you better understand how they work and why they might be the perfect choice for your home’s comfort.

Here are the most common myths about mini split systems.
- They can only be installed in new construction.One of the most common myths about mini split systems is that they can only be installed in new construction. While they are a very common choice for new construction, they will also work in existing homes.
Many homeowners choose to have a mini split system installed in addition to their existing HVAC system. Your mini-split system will heat or cool the living space as much as possible, and your HVAC system will kick on as a backup as needed.
If you have a room or section of the house where you struggle to control the temperature, a mini-split system is a great option to solve this issue.
Give our team a call at (512)323-2500 to learn more about our mini-split selection and great financing options.

- Mini-split systems are too expensive.Another common myth of mini-split systems is that they are too expensive. In reality, a ductless mini-split system can actually be a great way to save money.
A mini split system uses the same equipment to heat and cool your home, so you don’t have to worry about buying a separate furnace and air conditioner. Your total cost will depend on factors such as efficiency and energy type.
Mini split systems can be so efficient that they also allow you to save on your energy costs over their lifetime.
- Mini-split systems don’t work in cold climates.
Another common myth is that mini-split systems do not work in cold climates. Mini-split systems are not only energy-efficient air conditioners but also one of the most effective and energy-efficient heaters available.
Since mini-split systems offer higher efficiency rates than boiler-based systems, this ductless heat option costs less to operate by maximizing the amount of heat generated from the energy consumed.
If you’d like to learn more about mini-split options, give us a call at (512)323-2500.
- Mini-splits are high maintenance.You’ve probably heard the common myth that mini splits are high maintenance. The good news is that mini-split systems don’t require any more than the regular maintenance your traditional HVAC system needs.
You should change or clean the filter as recommended, remove debris from the outdoor compressor, and follow a standard HVAC maintenance schedule.
Since both the indoor and outdoor units of the mini split system are easily accessible, service is easier with it than with a traditional HVAC system.
We offer our HVAC Maintenance Plan for affordable maintenance from our skilled HVAC technicians. Learn more here – https://www.iairservices.com/maintenance-plans/

- Mini-split systems heat or cool rooms unevenly.Another widely heard myth about mini-split systems is that they heat or cool rooms unevenly. However, mini-split systems can often more effectively keep your entire home at one consistent temperature than a traditional HVAC system.
Modern mini-split systems are just as powerful as your traditional system and will heat your rooms evenly and efficiently.
A big benefit of mini-split systems is that you can adjust for individual temperature needs for hard-to-regulate rooms and areas of your house; traditional HVAC systems can’t adjust to the individual temperature needs of each room to reach a consistent temperature throughout your home.

- Mini-split systems are noisier than my traditional HVAC system.
Many people believe the myth that mini-split systems are noisier than traditional HVAC systems, but we’re happy to tell you that this myth is not true.
Thanks to modern technology in mini-split systems, they are whisper quiet. Since the unit runs continuously with blower speed variations to regulate temperatures instead of the on/off system we’re used to with traditional HVAC, there is virtually no noise.
We’d love to discuss this question and any others that you have about mini split systems. Give us a call anytime at (512)323-2500.

- Mini-split systems have bad air quality.This common myth about mini-split systems is quite the opposite. Mini-split ductless systems have been shown to improve air quality.
Mini-split systems are equipped with excellent filtration systems to ensure that clean air is coming into your home. This is why they are an especially great option for people with allergies or respiratory issues.
Without the need for ductwork, the risk of unhealthy air circulating through your home is greatly decreased since there is nowhere for the dirt, dust, and debris to build up and circulate throughout your home.

- Mini-split systems take a long time to heat or cool a room.Another common myth is that mini-split systems take a long time to heat or cool a room. We’re here to tell you the opposite.
A mini-split system runs continually at an even pace to maintain the temperature in the room. This makes it easy to regulate the temperature in each room and bring the temperature up or down easily.
If you’d like to hear more about our mini-split options, give us a call at (512)323-2500 anytime.

- Mini-split systems don’t last.Another widely spread myth is that mini-split systems don’t last as long as traditional HVAC systems.
The average lifespan of a traditional HVAC unit is 15 – 20 years with proper maintenance and repair. Mini split systems will last 20 years or longer with proper maintenance and repair.
Like a traditional HVAC system, routine maintenance by an HVAC professional is key to ensuring your system operates for as long as possible. We offer our HVAC Maintenance Plan for affordable maintenance by our HVAC professionals. You can learn more here – https://www.iairservices.com/maintenance-plans/

By dispelling these common myths, we hope you have a clearer understanding of the true benefits that mini-split systems offer. At Intelligent Air Services, we’ve been helping Austin homeowners make informed HVAC decisions since 2013, and we’re here to provide the guidance and expertise you need.
If you’re considering a mini-split system or have more questions, don’t hesitate to reach out to our experienced team. We’re ready to help you explore your options and find the best solution for your home’s comfort needs. Call us anytime (512)323-2500.

Discover our range of services at Intelligent Air Services
There’s nothing more frustrating than hearing your air conditioner running but feeling no air coming out of the vents, especially during the sweltering Austin heat. Before you reach out to the professionals, there are a few troubleshooting steps you can take to try and resolve the issue on your own.
Since 2013, Intelligent Air Services has been the trusted HVAC company for Austin and the surrounding areas, and we’re here to help you keep your home cool and comfortable.
In this blog, we’ll share some practical tips to get your AC back on track, so you can decide if it’s something you can fix or if it’s time to call in our experts.
A large portion of issues with your air conditioning stem from these 2 causes:
- Lack of Maintenance – Routine maintenance is key to keeping your system running efficiently for many years to come. Our HVAC Maintenance Plan offers affordable twice-yearly maintenance on your system to ensure small issues are identified and fixed before they lead to much larger issues.
- Broken HVAC components – While routine maintenance is crucial to increasing the life of your system, you may still encounter broken or malfunctioning parts that require repair or replacement. A lot of these issues will go unnoticed until your unit stops working or air stops coming out of your vents.

Here are the 11 reasons why your AC is running, but there is no air coming out of your vents.
- Check Your Vents
If your AC is running and you are not feeling air coming out of your vents, you will first want to check all of your vents to see if you have an issue with just one or with multiple vents.
If you notice a lack of airflow in just one area of your home, check to ensure that the registers in this area are completely open. Most vents have a switch or toggle to open and close the vents – you want to make sure that none of your vents have been inadvertently closed.
You also want to check the vents for any obstructions that could be blocking the airflow. If you notice any, clear the obstructions and you will hopefully have fixed your issue.

- Thermostat Issues
If you are still experiencing lack of air coming from your vents, your thermostat is the next likely culprit. Make sure that your thermostat is switched to ‘cool’, and that the temperature is set lower than the current temperature of your home.If you have a battery-operated thermostat, you will also want to check that your batteries aren’t in need of a change. Low or dead batteries can cause your thermostat to malfunction and not communicate effectively with your system and can ultimately impact your airflow.
While at your thermostat, you will want to open the cover to check for any dust or debris that may be affecting your connection. You can remove any grime with a soft brush.
If you notice any wires that are damaged or broken, it’s time to call in the professionals at Intelligent Air Services. for a fix to get your AC back up and running – https://www.iairservices.com/contact-us/

- AC Blower IssuesIf you can hear your AC running, but the fan isn’t kicking on you will want to try lowering the temperature on your thermostat a few degrees. If your fan is still suspiciously quiet, this can be an indication of an issues with the AC blower.
The AC blower pushes the cold air out to the ductwork and through your house. Excessive dust can accumulate on the blower blades and cause the blower motor to malfunction.
To address this issue, turn off your AC and remove the covers on your indoor unit to expose the AC blower. Once open, gently wipe away any grime from the blower, replace the covers, and turn your AC back on.
If your airflow is still lacking, give us a call at (512)323-2500 and we’ll send one of my HVAC experts out to properly diagnose and resolve this fan issue for you.
- Check Your Air FilterOn the opposite side, if your AC and fan are both running and you still are not getting airflow through your vents, you will want to check for a dirty air filter. The air filter collects dust and debris and can block airflow through your system if not changed routinely.
If left dirty and unchanged, it will greatly restrict airflow through your system and can cause your unit’s coils to freeze over.

- Frozen Evaporator CoilA dirty air filter or a blocked return vent can greatly restrict airflow through your unit and cause the evaporator coil to freeze over. When this happens, the air is blocked from passing over the coils and into your duct system to be pushed out through the vents.
The first place that evaporator coils will freeze is within your air handler. If you notice ice forming on the lines or if they’re already frozen over, you will want to turn your thermostat fan to ‘ON’ instead of ‘Auto’ to help thaw the refrigerant lines.
It’s very important that you do not chip away the ice or try to use a hair dryer to melt the ice. This can cause further damage to your unit.
If you have changed your air filter and checked your return vents for obstructions and your evaporator coil continues to freeze over, it’s time for a call to Intelligent Air Services at (512)323-0500.

- Leaking or Blocked DuctsThe ductwork is in place to deliver cold air throughout your home. With time and with lack of maintenance, your ductwork can become damaged or clogged. Issues with your ductwork can greatly restrict the airflow throughout the vents in your home.
Have you done any recent work in your attic? This may have caused damage or a section of your ductwork to come apart.
If you notice uneven cooling, dust in the air, or you notice twists in your ductwork, you will want to contact a professional at iAir or try to inspect the ductwork yourself.
You will want to check for crack or holes within the ductwork as well as for leaks where the ducts join together. You will want to use foil-faced tape or mastic air duct sealant to seal any leaks or holes in your ductwork.

To check for ductwork blockage, you will want to check the airflow from individual vents to find any that are not blowing air at all. If you suspect a blocked duct, it’s best to call in the experts of Intelligent Air Services to efficiently resolve the issue – https://www.iairservices.com/contact-us/
- Over or Undersized DuctworkIncorrectly sized ductwork can also cause airflow issues throughout your home.
Ductwork that is oversized will have a hard time maintaining air pressure and will result in low air pressure throughout your vents.
Undersized ductwork will cause the airflow to be heavily restricted and will not be able to distribute it evenly throughout your home, which will result in low airflow from your vents.

If you suspect an issue with ductwork sizing, give us a call at (512)323-2500 for proper inspection.
- Limited Return AirIf your system is not receiving adequate air from your return vents, the air conditioning process will not work efficiently. To efficiently distribute cool air throughout your home, the same amount of air must return to be reconditioned and redistributed through the vents.
You will want to check and ensure that the return vents throughout your vent are not blocked. If these vents are blocked, it can lead to a lack of air being pulled back into your system.
If you are concerned that you don’t have the adequate amount of return air vents in your home, call on the HVAC experts at iAir at (512)323-2500 for a thorough inspection.
- Condenser Unit is Dirty or DamagedLeaves, dirt, and other debris can easily get stuck in your air conditioner’s outdoor unit. This will cause your unit to have to work harder and can lead to your unit overheating.
Routine maintenance is key to ensuring that debris don’t accumulate in your outside unit and cause issues. We recommend our HVAC Maintenance Plan for affordable twice-yearly cleaning and maintenance that will ensure your unit continues to run efficiently for years to come. Visit https://www.iairservices.com/maintenance-plans/ or give us a call at (512)323-2500 to learn more.

- Low Refrigerant LevelsIf your refrigerant levels are low, you may notice low or no air blowing through the vents as well as reduced cooling throughout your home.
A lack or AC maintenance can lead to corrosion buildup in your air conditioner. This buildup can cause cracks and holes in your AC coil and lead to leakage or your refrigerant.
Call on Intelligent Air Services at (512)323-2500 to refill your refrigerant to ensure the levels match exactly with the levels specified by your AC’s manufacturer.

- Aging HVAC UnitA significant decrease in your air conditioner’s airflow can be an indication that your unit might be near the end of its life. Towards the end of life, a unit does not work as efficiently and cannot always maintain optimum airflow.
Typical HVAC units last 15-20 years and up to 25-30 years with proper maintenance. Your HVAC unit will get less efficient as it ages. If your unit is older than this, one of our HVAC professionals can thoroughly inspect your unit and go over the best options for your individual needs.
Give us a call to learn more at (512)323-2500 to learn more about our current specials and financing deals to get you into a new unit affordably.
If you have followed these troubleshooting steps and are still having airflow issues from your vents, it may be the sign of a bigger issues. There are a handful of issues that can limit the airflow to your vents and will require a call to iAir at (512)323-2500 to properly fix.
- Indoor fan motor failure
- Capacitor failure
- Malfunctioning compressor
- Mechanical problems

If your air conditioner is still running but not delivering air after trying these troubleshooting tips, it may be time to call in the professionals. At Intelligent Air Services, we’ve been serving Austin and the surrounding areas since 2013, providing reliable HVAC solutions to keep homes cool and comfortable.
Don’t let an underperforming AC disrupt your comfort—reach out to our expert team for prompt, efficient service. We’re here to diagnose the problem and get your system running smoothly again, ensuring your home stays cool no matter how high the temperatures rise. Give us a call anytime at (512)323-2500.
For professional HVAC support, reach out to Intelligent Air Services
When your air conditioner is running but not blowing cool air, it can quickly turn a hot Austin day into an uncomfortable situation. Before you pick up the phone to call in the professionals, there are a few troubleshooting steps you can try on your own to potentially resolve the issue.
Since 2013, Intelligent Air Services has been the go-to HVAC provider in Austin and the surrounding areas, helping homeowners stay cool and comfortable. In this blog, we’ll walk you through some simple tips to help you identify and fix the problem, so you can get your AC back to blowing cool air without delay.
We’re here to help you with 15 troubleshooting tips for your AC not blowing cool air before you call in the Austin professionals at Intelligent Air Services.
- The first thing to check is the thermostat settings. Please double-check that the system is on and set to cool and that the temperature setting has not been inadvertently changed. You can also change out the batteries in the thermostat, especially if the thermostat is malfunctioning. If any settings are incorrect, make the appropriate adjustments and let the system kick back on. Give it a few minutes to adjust, and then check that cool air is blowing out from the vents. If you feel cool air, you’ve fixed the problem! If not, let’s move on with our troubleshooting.
- Very often, the fix is quite simple. Have you checked the air filter lately? A check of this may fix your problem. Turn the system off and remove your air filter for inspection. Since the air filter catches dust, dirt, and other airborne particles, a dirty air filter can block airflow and cause your AC to not blow cool air through your vents. If the air filter appears dirty, replace the filter and see if this fixes the issue.

- In some houses, the Furnace/AC unit is wired to a switch in your utility room. Double-check that no power switch in your utility room has been switched off.
- The next likely reason your AC is not blowing cool air is your circuit breaker. Often, there is a separate breaker for the indoor and outdoor AC units. Check to ensure all appropriate breakers are switched on.
- Lack of maintenance on your outdoor unit can cause many issues with your unit. Complete a visual inspection of the area and ensure at least 2 feet of space around the unit. You may need to remove leaves, branches, or debris around the unit. If you haven’t had your unit serviced recently, it may be a great time to call on the experts at the Intelligent Air Services for a professional inspection and maintenance. We offer our HVAC Maintenance Plan for affordable maintenance bi-annually with multiple payment options. Learn more about our HVAC Maintenance Plan and its benefits here – https://www.iairservices.com/maintenance-plans/

- Clearing away the leaves, branches, and other debris around the unit will also be helpful if you have a blocked condenser fan. The condenser fan brings air into the outdoor unit and through the condenser coil to pull heat from the home. If there is debris accumulated between the fans, this can clog the coil and reduce energy efficiency, and lead to your AC not blowing cool air.
- A dirty condenser coil may also be causing the issue. The condenser coil wraps around the outdoor unit condenser and can also accumulate dirt, filth, and debris, which will restrict important heat transfer.

- Check your outdoor disconnect. This box is mounted near the outside AC unit and is a safety feature that can shut off the electrical unit. If the disconnect power is shut off, turn it back on. You can also check for damaged or faulty issues that may be causing an issue and will require a call to the professionals at the Intelligent Air Services.

- A dirty or frozen evaporator coil may be the problem causing your AC to run but not cool the air. When an evaporator coil is dirty, it blocks the heat transfer from the air to the refrigerant and causes the coil to freeze. Some signs of a frozen evaporator coil are frost formed on the copper refrigerant tubing, increased utility bills, and the system not adequately cooling. If this is the case, turn the AC off and allow your system to run on ‘fan only’ until the coil is no longer frozen, and then turn the AC back on.
- A dirty indoor fan motor can also create problems leading your AC to not blow cool air. When this fan is dirty, the fan cannot pull enough hot air into the unit to cool your home adequately. This fan cleaning can be completed by one of our HVAC pros. Give us a call (512)323-2500 and we’d be happy to help!

- Another potential source of your issue is a clogged condensation drain hose. The condensation drain hose removes moisture from the condensation created when the AC removes the humidity and directs it outside the home or to a floor drain. These drain hoses can become blocked by mold or algae growth, but this can be easily removed by a small screwdriver or something similar to clear the clog. If you find a clog high in the line, using suction from a wet/dry shop vac can often remove it.
- Sometimes, a refrigerant leak may be your problem. This chemical is crucial for the cooling process, and a leak can cause your unit not to blow cool air, run for longer periods, and cause damage to your compressor or a system shutdown. Call iAir for a guaranteed fix if you suspect a refrigerant leak.
- If you have air blowing out of your vents but your house is not cooling, a leak in the ductwork may be the cause. Ductwork leaks can lead to the cold air escaping before it reaches rooms, causing it to feel uncomfortably warm while other rooms feel colder. Finding the leak and fixing the ductwork can help with efficiency and performance. Call us, and we’d love to send out one of our knowledgeable techs to diagnose the issue – https://www.iairservices.com/contact-us/
- A faulty compressor, a broken capacitor, a malfunctioning contactor, and a faulty condenser fan motor are all parts of your outdoor unit that can malfunction and lead to the air from the vents not being cool in your home.

- Last but certainly not least, it may be time to look at replacing your AC unit due to age or insufficient capacity to cool your home. Call on the experts since 2013, Intelligent Air Services, to take advantage of one of our amazing financing offers. We will discuss all your wants and needs to help you select a new, properly sized unit to keep you super cool all summer long. Give us a call at (512)323-2500 to learn more.
If your air conditioner is still running but not blowing cool air after trying these troubleshooting steps, it’s likely time to call in the experts. At Intelligent Air Services, we’ve been helping Austin homeowners beat the heat since 2013 with reliable and professional HVAC services.
Don’t let a malfunctioning AC leave you sweating—contact our team for prompt assistance. We’ll diagnose the issue and restore your system’s cooling power, ensuring your home stays comfortably cool, even on the hottest Texas days. Give us a call anytime at (512)323-2500.
Learn more about our cooling services at Intelligent Air Services
My AC is Shutting Off and On: Easy Fixes from Austin HVAC Expert
Is your air conditioner acting up, turning on and off more frequently than usual? You’re not alone. This frustrating issue, known as short cycling, is a common problem that plagues homeowners, especially during scorching summer months. Imagine trying to cool down after a long day, but your AC keeps kicking on and off, never reaching the desired temperature. Not only is this disruptive, it also signals potential underlying problems that could lead to costly repairs if left unchecked.
But don’t sweat it! In this comprehensive guide, we’ll explain the common causes of AC short cycling, provide practical DIY troubleshooting steps, and help you determine when it’s time to call a professional.
Why Your AC Keeps Shutting Off and On
To troubleshoot why your AC keeps turning on and off, it’s crucial to grasp the basics of how it operates and the concept of short cycling. Your AC unit is a complex system designed to remove heat and humidity from your home. Here’s a simple explanation of how it works:
- Refrigerant cycle: A special fluid called refrigerant circulates through a closed-loop system in your AC unit. It absorbs heat from indoor air, transforming from a liquid to a gas. The gas then flows to the outdoor unit (condenser), releasing the heat and returning to a liquid state, ready to start the cycle again.
- Thermostat’s role: Your thermostat acts as the control center, monitoring the indoor temperature and signaling the AC to turn on or off to maintain your desired temperature.
What is short cycling?
Short cycling refers to the AC unit turning on and off frequently, often running for only a few minutes at a time. Instead of completing an entire cooling cycle, it prematurely shuts off and restarts, leading to a cycle of short bursts of operation.
Short cycling forces your AC to work harder than necessary, resulting in higher energy bills. The constant starting and stopping also strains the AC’s components, leading to premature wear and tear and potentially costly repairs.
Additionally, short cycling prevents your AC from running long enough to properly dehumidify the air, making your home feel less comfortable. The added stress can cause damage to the compressor, the heart of your AC system, which can be a major expense to replace. Understanding the root causes of short cycling is key to fixing the issue.
Here’s a breakdown of the most common culprits of short cycling:
- Thermostat issues – A faulty thermostat might send incorrect signals to your AC, causing it to shut off prematurely. If your thermostat is placed in direct sunlight or near a heat source, it might be sensing a higher temperature than the actual room temperature, leading to short cycling.
- Refrigerant issues – Insufficient refrigerant can cause your AC to overheat and shut down. A qualified technician should address refrigerant leaks. If your AC is low on refrigerant, it’s often due to a leak in the system, which requires professional repair.
- Airflow problems – Clogged filters restrict airflow, causing your AC to work harder and potentially overheat. Reduced airflow can also cause the coils to freeze, leading to short cycling.
- Electrical problems – Damaged or loose wires can disrupt the electrical signals that control your AC. The capacitor also helps start the compressor. If it’s failing, your AC might have trouble starting or running.
- Oversized AC unit – If your AC unit is too large for your space, it will cool the area quickly and shut off before a full cycle is complete, leading to short cycling. This is less common but worth considering if your AC has always cycled rapidly.
- High ambient temperature: On extremely hot days, your AC might struggle to keep up with the demand, leading to frequent on/off cycling.
- Dirty condenser coils: The outdoor unit’s coils can accumulate dirt and debris, hindering heat dissipation.
By understanding these common causes, you can begin to troubleshoot your AC issue and take the necessary steps to restore its normal operation. If you have any questions or need further assistance, the experts at iAir are always ready to help. Contact us at (512)323-2500 for more information and support.
AC Short Cycling: How To Fix
Before you start troubleshooting, remember safety first! Always turn off the power to your AC unit at the circuit breaker before performing any maintenance or repairs. This will prevent electrical shock and protect both you and your equipment.
#1 Check and replace air filters.
Dirty filters restrict airflow, forcing your AC to work harder and potentially overheating, leading to short cycling. To check, locate your air filter(s)—usually behind a return air grille or within the air handler unit—and inspect for dirt and debris buildup. You must replace filters every 1-3 months, or more often if you have pets or live in a dusty environment. Refer to your AC unit’s manual for the recommended filter type and size.
To replace air filters, turn off the power, remove the old filter, and insert the new one, ensuring proper airflow direction (indicated by arrows on the filter frame).
#2 Clean condenser coils.
The condenser coils, located in the outdoor unit, dissipate heat. When dirty, the AC becomes less efficient and may overheat, leading to short cycling. To clean condenser coils:
- Turn off the power to the outdoor unit.
- Carefully remove the protective grille or cover.
- Rinse with a hose (low pressure) from the inside out and allow to dry completely.

#3 Check and Clean Vents.
Blocked vents or registers restrict airflow, making your AC work harder and potentially causing it to overheat. Be sure to inspect all supply and return vents for obstructions. To clean, remove any furniture, rugs, or other items blocking the vents. Use a vacuum or duster to remove dust and debris from the vents and grilles.

#4 Reset circuit breaker.
Sometimes, a tripped circuit breaker can cause your AC to shut down unexpectedly. To reset, locate your electrical panel and identify the breaker that controls your AC unit. If the breaker is tripped (in the “off” or middle position), switch it fully off and then back on.
#5 Inspect the thermostat.
A malfunctioning or incorrectly set thermostat can send erroneous signals to your AC, causing short cycling. To inspect, check the thermostat settings to ensure they are in cooling mode and set to your desired temperature. Replace batteries if needed. Some thermostats have calibration options. Refer to your owner’s manual for instructions.
#6 Restart your AC.
Sometimes, a simple restart can resolve temporary glitches. Turn off the AC at the thermostat and breaker, wait a few minutes, then turn them back on.
#7 Check for ice buildup.
If you see ice on the evaporator coils (indoor unit) or refrigerant lines, it indicates a problem that requires professional attention. Turn off the AC and let the ice melt completely before calling a technician.
When to Call a Professional
While many AC short cycling issues can be resolved with DIY fixes, some problems require professional expertise. Call a qualified HVAC technician if:
- You suspect a refrigerant leak.
- The electrical components (wiring, capacitor) appear damaged or faulty.
- You’ve tried the above DIY fixes, but the problem persists.
For easy, affordable maintenance, sign up for iAir’s HVAC Maintenance Plan and rest easy that your unit is taken care of. Our maintenance plan includes bi-annual maintenance and a load of other benefits. Call us anytime at (512)323-2500 to learn more or request an estimate
Additional Tips to Keep Your Cool
While troubleshooting and fixing your current AC is essential, here are some additional tips to improve your cooling experience and potentially prevent future short cycling issues:
Upgrade Your AC
If your AC unit is old, inefficient, or constantly requires repairs, consider upgrading to a newer, more energy-efficient model. Modern AC units often come equipped with advanced features like variable-speed compressors, which can adjust their output based on cooling demand, thus minimizing short cycling and saving energy. According to the U.S. Department of Energy, replacing a 10-year-old AC unit with a newer, ENERGY STAR-certified model can reduce your cooling costs by 20%.
Smart Thermostats
Smart thermostats offer a range of features that can help prevent short cycling and optimize energy usage. They can learn your cooling preferences and adjust settings automatically based on your schedule and occupancy patterns. Some models even offer remote access, allowing you to control your AC from your smartphone. A study by Nest Labs found that their smart thermostat users saved an average of 10-12% on heating and 15% on cooling bills.
Energy-Saving Tips
Reducing your reliance on air conditioning can lower your energy bills and lessen the strain on your AC unit, potentially preventing short cycling. Here are some tips:
- Shade your windows – Use curtains, blinds, or awnings to block direct sunlight and reduce heat gain in your home.
- Improve insulation – Proper insulation prevents cool air from escaping and warm air from entering, reducing the workload on your AC.
- Use fans – Ceiling fans or portable fans can create a cooling breeze and make you feel more comfortable at higher thermostat settings.
- Seal air leaks – Check for gaps around windows, doors, and ductwork, and seal them to prevent air leakage.
Implementing energy-saving measures and addressing short-cycling issues can significantly reduce cooling costs and environmental impact. Remember, a well-maintained AC unit is more reliable and cost-effective in the long run. Visit https://www.iairservices.com/maintenance-plans/ or give us a call anytime at (512)323-2500 to learn more and sign up.
The Bottom Line
In conclusion, an air conditioner that keeps shutting off and on can be frustrating and potentially costly. However, understanding the common causes behind this issue empowers you to take action. Remember, safety always comes first—turn off the power before attempting any repairs. If the problem persists or seems more complex, don’t hesitate to seek us for professional assistance.
Thank you for relying on iAir for your HVAC needs since 2013. If you have any questions or require professional help, our experienced team is always available to assist you. Don’t let a malfunctioning AC ruin your summer. Take control of your cooling system and enjoy a comfortable, refreshing indoor environment all season long!
For reliable HVAC solutions, visit Intelligent Air Services
When it comes to keeping your home comfortable and your heating system running efficiently, changing your furnace filter regularly is a crucial task. At Intelligent Air Services, we’ve been the go-to HVAC professionals in Austin and the surrounding areas since 2013, dedicated to providing top-quality service and expert advice.
In this step-by-step guide, we’ll walk you through the process of changing your furnace filter, helping you maintain a cozy home and improve your indoor air quality. Trust the experts at iAir to show you how simple maintenance can make a big difference!

Why Change Your Furnace Filter?
Think of your furnace filter as the lungs of your home. With each breath your HVAC system takes, the filter traps dust, pollen, pet dander, mold spores, and countless other microscopic particles. This filtration is crucial for maintaining healthy indoor air quality (IAQ). Studies consistently link poor IAQ to a range of health concerns, especially for those with asthma, allergies, or respiratory sensitivities.
Beyond health impacts, a clean filter keeps your furnace running at peak efficiency. A dirty, clogged filter creates resistance to airflow, forcing the blower motor to work harder and consume more energy. According to the Department of Energy, a dirty filter can increase energy costs by up to 15%. Regular filter changes translate to real dollar savings on your energy bills.
Perhaps most importantly, filter changes help prevent costly breakdowns. When airflow is restricted, your furnace’s critical components overheat and experience excessive wear and tear. This can lead to expensive repairs or even the premature need to replace the entire furnace. Think of a filter change as a small investment that protects your much larger investment in your HVAC system.
For easy, affordable maintenance, sign up for iAir’s HVAC Maintenance Plan and rest easy that your unit is taken care of. Our maintenance plan includes bi-annual maintenance and a load of other benefits. Visit https://www.iairservices.com/maintenance-plans/ or call us anytime at (512)675-6997 to learn more or sign up.

How Often to Change Your Filter
The general rule of thumb is to change your furnace filter every 1-3 months. However, this is just a baseline, and several factors can make more frequent changes necessary. Here’s how to know when it’s time:
Pets: Pet hair and dander can clog filters quickly. If you have furry companions, aim to change your filter monthly.
Smokers: Indoor smoking dramatically reduces air quality. Protect your filter and your lungs by replacing it monthly if anyone in the household smokes.
Allergies/Sensitivities: If seasonal allergies or dust sensitivity are a concern, opt for higher MERV-rated filters and consider changing them every 4-6 weeks, especially during peak allergy seasons.
Construction/Renovations: Home improvement projects generate significant dust. Change your filter more often until construction is complete.
Visual Inspection: The best indicator is simply looking at your filter. Holding it up to the light, if you can’t see through it easily, it’s time for a replacement, regardless of the timeline. Even if your filter looks clean, it’s vital to adhere to the recommended change intervals to capture microscopic particles and maintain optimal furnace performance.
If you ever have questions about how often to change your furnace filter, give one of our professionals a call anytime at (512)675-6997.

Step-by-Step Guide to Changing Your Furnace Filter
Don’t be intimidated by furnace maintenance. Changing your filter might sound technical, but it’s incredibly straightforward. Let’s break it down into simple steps.
Step 1: Turn off the furnace.
Before interacting with your furnace, locate the power switch near the unit and flip it to the “OFF” position. This switch usually resembles a standard light switch. If you don’t find a dedicated switch, access your home’s electrical panel (breaker box) and turn off the breaker labeled for the furnace.
If uncertainty persists about the correct breaker, you can temporarily turn off the main power switch as a safety precaution. Cutting power to the furnace is vital to prevent accidental startup while you’re changing the filter.

Step 2: Find the filter.
Furnace filters can be located in a few different places. The most common locations are within the return air duct (check for a large grille on the wall or ceiling), directly inside the blower compartment of the furnace, or behind a removable panel. If you are unsure of your filter’s location, consult your furnace’s owner’s manual. It will provide specific diagrams and instructions for your model.

Step 3: Remove the old filter.
Before removing the old filter, pay close attention to how it’s installed. You’ll likely see arrows printed on the frame of the filter. These arrows indicate the direction of airflow through the furnace. It’s crucial to note this direction so you install the new filter correctly. Carefully slide out the old filter, keeping track of the way it was oriented. Some filter housings may have additional clips or fasteners, so be sure to release those before removing the filter entirely.

Step 4: Insert the new filter.
Unpack your new replacement filter, ensuring it’s the correct size and MERV rating for your furnace. Locate the airflow arrows printed on the frame of the new filter. These arrows must align with the airflow direction you noted when removing the old filter. Slide the new filter into place, making sure it fits snugly within the filter housing.

Step 5: Secure the filter housing.
Once the new filter is firmly in place, ensure that the filter housing is properly closed and secured. If your filter is located behind a panel or door, make sure it closes completely and that any latches or fasteners are engaged. In the case of filters within return air grilles, double-check that the grille is seated correctly with no gaps where air could bypass the filter. A secure fit prevents unfiltered air from entering your system.
Step 6: Turn the furnace back on.
Restore power to the furnace by flipping the power switch back to “ON” or resetting the circuit breaker. Listen to your furnace as it starts up. It should sound normal and consistent with its usual operation. Take a moment to verify that air is properly flowing from your vents.
Step 7: Mark the installation date.
Use a pen or marker to write the current date directly on the frame of the new filter. This simple step makes it incredibly easy to track when your next filter change is due, ensuring you don’t accidentally neglect this important task.

Troubleshooting
While changing a furnace filter is usually straightforward, occasionally, you might run into a few snags. Here’s how to handle common issues:
- Difficulty finding the filter: Every furnace model is slightly different. If you’re struggling to locate your filter, start by consulting the owner’s manual for your specific furnace. It will provide diagrams and detailed instructions.
- Filter doesn’t fit: If you’ve purchased the correct size and it still won’t fit, double-check the measurements of the filter slot. The filter packaging may have been mislabeled. If the size is indeed correct, return the filter and confirm that you have the right model for your furnace.

- Unusual noises after filter change: If your furnace makes strange sounds after the filter replacement, start by ensuring the filter is inserted fully, and the airflow arrow is in the correct direction. Also, carefully inspect the filter housing to ensure all panels, doors, or grilles are correctly closed with no loose parts or obstructions. If noises persist despite these checks, turning off the furnace and contacting an HVAC technician for further diagnosis is advisable.
If you feel more comfortable with one of our HVAC professionals troubleshooting the issue, call us anytime at (512)675-6997.
Additional Tips
Here are a few more tips to streamline your furnace filter maintenance and ensure peak system performance:
- Stock up on filters: Purchasing multi-pack filters often saves money and ensures you always have a spare on hand. Store extra filters in a clean, dry place.
- Subscribe to filter change reminders: Several filter manufacturers and large retailers offer email or text reminders when it’s time for a filter swap. These free services take the guesswork out of remembering your change intervals.
- Consider professional HVAC maintenance: While changing a filter is a DIY task, investing in annual professional HVAC maintenance is wise. These checkups often include filter changes as well as a comprehensive furnace inspection. This can identify potential problems early, maximizing efficiency and ensuring your system’s longevity. iAir offers our HVAC Maintenance Plan for affordable twice-yearly maintenance. Visit https://www.iairservices.com/maintenance-plans/ or give us a call anytime at (512)675-6997 to learn more and sign up.
The Bottom Line
Changing your furnace filter is a simple yet vital step in maintaining your heating system’s efficiency and ensuring clean indoor air. At Intelligent Air Services, we are committed to helping our Austin community with expert HVAC care and practical advice.
If you have any questions or need professional assistance, our team is here to support you. Thank you for choosing iAir as your trusted HVAC partner since 2013. Here’s to a comfortable and cozy home all year round!
Explore our heating services at Intelligent Air Services
Carbon monoxide (CO) is a colorless, odorless, and tasteless gas that can be deadly if not detected early. It is produced by the incomplete combustion of fossil fuels, such as natural gas, propane, and oil. CO poisoning can happen in any home or building, regardless of age or condition. In this blog post, we will discuss the dangers of carbon monoxide and provide useful tips to prevent CO poisoning.
WHAT IS CARBON MONOXIDE POISONING?
Carbon monoxide poisoning occurs when a person inhales too much CO. The gas enters the bloodstream and binds to hemoglobin, reducing the amount of oxygen that can be carried to the body’s tissues. Symptoms of CO poisoning can be similar to the flu, including headache, dizziness, nausea, and fatigue. In severe cases, CO poisoning can cause unconsciousness, brain damage, and death.
PREVENTING CARBON MONOXIDE POISONING
The best way to prevent CO poisoning is to install a carbon monoxide detector on every level of your home or building. CO detectors should be placed near sleeping areas and at least 15 feet away from fuel-burning appliances. It is also important to have your HVAC system inspected and maintained by a professional HVAC contractor, such as Intelligent Air Services, LLC (iAir). Regular maintenance can help ensure that your heating system is functioning properly and not producing dangerous levels of CO.
Other tips to prevent CO poisoning include:
- Never use a generator, charcoal grill, or other fuel-burning devices inside your home or garage.
- Do not leave your car running in an enclosed space, such as a garage.
- Have your chimney and fireplace inspected and cleaned annually.
- Check your fuel-burning appliances, such as water heaters and stoves, for proper ventilation and exhaust.
WHAT TO DO IF YOU SUSPECT CO POISONING
If you suspect CO poisoning, leave the area immediately and call 911. Do not open windows or doors to ventilate the area, as this can spread the gas throughout your home or building. Seek medical attention right away, even if you do not have symptoms.
INTELLIGENT AIR SERVICES, LLC
Carbon monoxide poisoning is a serious and potentially deadly issue that affects millions of people each year. By understanding the dangers of CO and taking steps to prevent it, you can help keep yourself and your family safe. If you need help with your HVAC system or want to learn more about carbon monoxide, contact Intelligent Air Services, LLC (iAir) today. Our team of experts can provide you with the information and services you need to ensure your home is safe and comfortable.
For safety inspections, contact Intelligent Air Services
As a homeowner, you may have heard several myths about HVAC systems that can be confusing and misleading. Unfortunately, believing in these myths can lead to incorrect maintenance practices, higher energy bills, and even damage to your HVAC system. In this blog post, we will debunk some of the most common myths about HVAC systems and provide you with useful tips to ensure your HVAC system runs efficiently and effectively.
MYTH #1: CLOSING VENTS IN UNUSED ROOMS SAVES ENERGY
Many homeowners believe that closing vents in unused rooms can save energy and reduce their energy bills. However, this is a myth. Closing vents can actually increase the pressure in your HVAC system, leading to air leaks and reduced efficiency. Instead, consider installing a zoning system that allows you to control the temperature in each room individually.
MYTH #2: A BIGGER HVAC SYSTEM IS ALWAYS BETTER
Many homeowners believe that a bigger HVAC system will cool or heat their home faster and more efficiently. However, this is not always the case. An oversized HVAC system can lead to short cycling, which means that the system turns on and off frequently, wasting energy and reducing the lifespan of the system. It’s important to choose the right size HVAC system based on the size of your home and your specific cooling and heating needs.
MYTH #3: REGULAR MAINTENANCE IS NOT NECESSARY
Some homeowners believe that their HVAC system does not need regular maintenance, as long as it is running smoothly. However, regular maintenance is crucial to ensure the efficiency and longevity of your HVAC system. Regular maintenance can help identify potential problems early on, prevent breakdowns, and improve the overall performance of your HVAC system.
MYTH #4: CLOSING DOORS AND WINDOWS WILL KEEP YOUR HOME COOL OR WARM
Many homeowners believe that closing doors and windows will keep their home cool or warm. However, this is not always the case. Closing doors and windows can actually trap the air inside your home, leading to poor air quality and reduced efficiency. Instead, consider installing a ventilation system that allows fresh air to circulate throughout your home.
MYTH #5: YOU CAN SAVE MONEY BY INSTALLING A NEW HVAC SYSTEM YOURSELF
Some homeowners believe that they can save money by installing a new HVAC system themselves. However, this is not recommended. Installing an HVAC system requires specialized knowledge and skills, and attempting to install it yourself can lead to safety hazards, damage to your home, and reduced efficiency. It’s important to hire a professional HVAC contractor to install your new system.
In conclusion, believing in common myths about HVAC systems can lead to incorrect maintenance practices, higher energy bills, and even damage to your HVAC system. It’s important to be aware of these myths and to follow the correct maintenance practices to ensure the efficiency and longevity of your HVAC system. If you need professional HVAC services, contact Intelligent Air Services, LLC (iAir) in Austin, TX. Our experienced HVAC technicians can provide you with the best solutions for your HVAC needs.
Learn more about our HVAC services at Intelligent Air Services